A website migration checklist is your single most important tool for protecting your site's SEO, ensuring a smooth transition, and preventing a catastrophic loss of traffic. It's more than a simple to-do list; it's a strategic framework that needs to guide every single decision, from the initial planning all the way through to post-launch monitoring.
Why You Need a Migration Plan, Not Just a Checklist

Let me be blunt: a poorly executed website migration can wipe out years of hard-earned SEO progress literally overnight. This process is so much more than just shuffling some files from one server to another. You're handling a core business asset that directly fuels your marketing, sales, and customer experience. Treating it like a simple IT task is the first, and biggest, mistake you can make.
A successful transition is a genuinely complex project. It demands a detailed strategy, not just a list of items to tick off. Your checklist is the guide, but the plan is the roadmap. It's what forces you to think through every potential pitfall and dependency before it happens.
To give you a clearer picture, I've seen it helpful to break the entire process down into four distinct stages. Each one has a specific goal that builds on the last.
Core Stages of a Successful Website Migration
| Migration Stage | Primary Objective |
|---|---|
| Stage 1: Pre-Migration Planning & Discovery | To identify all risks, establish clear goals, benchmark current performance, and assemble the right team. |
| Stage 2: Pre-Launch Development & Testing | To build the new site on a staging server, implement redirects, and conduct thorough QA and SEO testing. |
| Stage 3: The Launch | To execute the go-live process flawlessly, monitor critical systems in real-time, and quickly address any immediate issues. |
| Stage 4: Post-Launch Validation & Monitoring | To track performance against benchmarks, validate that all SEO elements are working, and fix any lingering bugs. |
This structured approach ensures no critical step is missed, turning a potentially chaotic event into a controlled and predictable project.
The Real Risks of a Poorly Planned Migration
Ignoring the strategic side of a migration is a recipe for absolute disaster. I've personally seen real-world cases where what seemed like a minor site update—something as simple as a theme change or a switch to HTTPS—led to an immediate and devastating drop in organic traffic. These aren't just abstract numbers on a graph; they represent real lost leads, a nosedive in sales, and a damaged brand reputation.
The consequences are often severe. Without meticulous management, a migration poses a huge risk to your search engine rankings. It's not uncommon for businesses to report ranking drops of 40-50% right after a migration that lacked the proper SEO foresight. The work required to recover from a blow like that can take months.
A website migration is a critical business project. Framing it as anything less puts your revenue and online authority at serious risk. The goal is a seamless transition that fuels, rather than fights, your business growth.
Shifting from Checklist to Strategic Plan
The key is to reframe your perspective. A strategic, plan-driven approach—guided by a truly comprehensive checklist—is the only reliable way to protect your website’s hard-earned authority.
This means you absolutely must:
- Benchmark Everything: Before a single line of code is touched, you need to document your current performance. This includes everything from keyword rankings and organic traffic to bounce rates and conversion metrics. This data is your "before" picture.
- Map Every URL: You have to account for every single page on your old site and map it to its new home. This is completely non-negotiable for preserving your link equity and user experience.
- Involve All Stakeholders: Your SEO team, developers, content creators, and the marketing department must be perfectly aligned on the goals, the timeline, and their individual responsibilities. Communication is everything.
By focusing on a holistic plan, you elevate what could be a high-risk technical task into a strategic business initiative. For a deeper dive into the specific steps and what to expect, our full guide on what to expect during a website migration breaks it down even further. This approach doesn't just ensure your transition is successful—it turns it into an opportunity for genuine improvement.
Building Your Pre-Migration Blueprint

A website migration is won or lost long before you ever think about flipping the switch. I’ve seen it time and again: the most critical work happens right here, in the planning phase. Think of it as creating the architectural blueprint for a new building—without a solid plan, you’re just stacking bricks and hoping for the best.
This pre-migration blueprint is your master plan. It’s a living document that outlines every risk, goal, and resource you'll need to see the project through. Just like you'd use a comprehensive software deployment checklist for a new app, this blueprint is the non-negotiable foundation for a successful migration.
Getting this stage right means getting everyone on the same page, from marketing and SEO to your dev team and leadership. It’s where you define what success actually looks like and, just as importantly, how you’ll prove it.
Conducting a Full Content and SEO Audit
First things first: you need a complete inventory of what you currently have. You can't protect what you don't know exists. This means crawling your entire website to create a master list of every single URL.
I always reach for tools like Screaming Frog or Sitebulb for this job. They act like search engine spiders, meticulously cataloging every page, image, and file on your domain. Your crawl needs to capture specific data points for each URL:
- Status Codes: Which pages are live (200), redirected (301), or broken (404)?
- Metadata: Document all current meta titles, descriptions, and header tags (H1s, H2s).
- On-Page Content: Note word counts and any unique content elements that have to come over.
- Backlinks: Use a tool like Ahrefs or Semrush to inventory your most valuable backlinks and the pages they point to. These are your high-priority assets; they must be protected.
This audit produces a tangible asset—usually a massive spreadsheet—that becomes the bedrock of your migration plan. It’s the source of truth you'll rely on for URL mapping later on.
Benchmarking Current Performance Metrics
With your site fully inventoried, the next step is to grab a snapshot of your current performance. This data is your "before" picture, the baseline you'll use to measure whether the migration was a success. Without these benchmarks, you're just flying blind after launch.
Your benchmark report has to include key metrics from the last 3, 6, and 12 months to account for any business seasonality.
Key Performance Indicators (KPIs) to Track:
- Organic Traffic: Overall sessions, users, and pageviews from organic search.
- Keyword Rankings: Track the positions of your top 50-100 money-making keywords.
- Conversion Rates: Document goal completions, form submissions, or e-commerce transaction rates.
- Site Speed: Measure Core Web Vitals and page load times on key page templates.
- Indexing Status: Note the number of indexed pages reported in Google Search Console.
Setting clear goals here is everything. I’ve seen projects without a plan lose 20-30% of their organic traffic in the months following a launch.
For an e-commerce store moving from Magento to Shopify, a clear goal might be: "Maintain or increase organic traffic to our top 20 category pages while reducing the average page load time by 30% within 90 days of launch."
Assembling Your Migration Team and Timeline
A website migration is not a solo mission. It demands a cross-functional team where everyone knows their role. Honestly, miscommunication is probably the single biggest reason migrations go off the rails.
Your core team should typically include:
- Project Manager: The central hub who owns the timeline and keeps everyone accountable.
- SEO Specialist: The person responsible for the audit, URL mapping, redirect logic, and post-launch validation.
- Developer(s): The hands-on team handling the technical build, server configuration, and the final go-live deployment.
- Content Manager: Ensures all copy, images, and media are migrated correctly and updated where needed.
- Key Stakeholders: People from marketing, sales, or leadership who need to stay in the loop.
Once the team is set, you can build a realistic timeline. A classic mistake is underestimating how long each phase will take. For a medium-sized site, a migration can easily take 3 to 6 months. And whatever you do, schedule the final launch during a low-traffic period—like a weekday evening or a weekend—to minimize any disruption to your users. This careful planning is what sets the stage for a smooth, successful project.
Executing the Technical Migration with Precision
Alright, with a solid plan in your back pocket, it’s time to roll up our sleeves and get into the technical execution. This is where all that careful preparation really starts to pay off. We’re moving from spreadsheets and strategies to the actual nuts and bolts of building your new site. Precision is everything here.
The absolute first thing you need to do is set up a staging environment. I can't stress this enough. Think of it as a private, fully functional clone of your new website—a sandbox where you can build, test, and even break things without any of your live site visitors seeing a thing. In my experience, skipping this step is one of the biggest mistakes a team can make.
The Critical Role of a Staging Environment
Your staging site is your private workshop. It’s where you’ll bring all the pieces together—migrating content, setting up URL redirects, and kicking the tires on every feature. Working in a staging area lets your team breathe a little easier and accomplish some crucial tasks:
- Test without risk: Do all the contact forms work? Do the fancy new scripts fire correctly? The staging site lets you find out before a real customer does.
- Verify your redirects: You can implement all your 301 redirects and test them one by one to make sure they land on the right pages.
- Check performance: How fast is the new site on its new server? You can analyze its speed and Core Web Vitals without impacting your current site's performance.
- Get the final sign-off: This is the perfect chance for stakeholders and leadership to do a final walkthrough and give the thumbs-up before the big launch.
Honestly, this controlled testing ground is your single best defense against launching a buggy, broken, or slow website.
Migrating Content and Data Meticulously
Moving your content isn’t just a simple copy-and-paste operation. Every blog post, product page, image, and video needs to be transferred accurately, with all its formatting intact. For larger sites with thousands of pages, this often requires specialized migration tools or even custom-built scripts.
Don't forget about your databases. If you're running an e-commerce site, this is your customer data, order histories, and product inventory. For a content site, it’s your articles, author bios, and user comments. A huge part of any successful migration is creating multiple backups of your website files and databases before you touch anything. It's a safety net you hope you'll never need, but you'll be glad you have it if something goes wrong.
When you're adding new features, like different payment options, following a detailed guide is essential. For instance, if you want to know how to add crypto payments to your website, you'll see it involves precise technical steps to avoid creating issues for users. The same principle applies to your entire migration.
Implementing Your URL Map and Redirects
Remember that URL map you painstakingly created during the planning phase? It’s now your go-to instruction manual. This spreadsheet tells you exactly how to connect every old URL to its new home using 301 redirects. A 301 is a permanent redirect that tells browsers and search engines, "Hey, this page has moved for good," and it passes along the hard-earned SEO authority with it.
One of the most common—and damaging—mistakes I see is a blanket redirect. That’s when someone gets lazy and just points all the old URLs to the new homepage. This is a disaster for your SEO and a nightmare for users. Every old page must map to its most relevant new counterpart.
This part of the process can be tedious, but it is absolutely vital. I always use a tool like Screaming Frog to crawl the full list of old URLs and confirm every single one returns a 301 status code and redirects to the correct new page. Your post-migration SEO performance literally hangs in the balance here.
The moment you update your domain to point to the new site can be nerve-wracking. This graphic shows a simplified flow for handling that DNS change, which helps take some of the guesswork out of it.
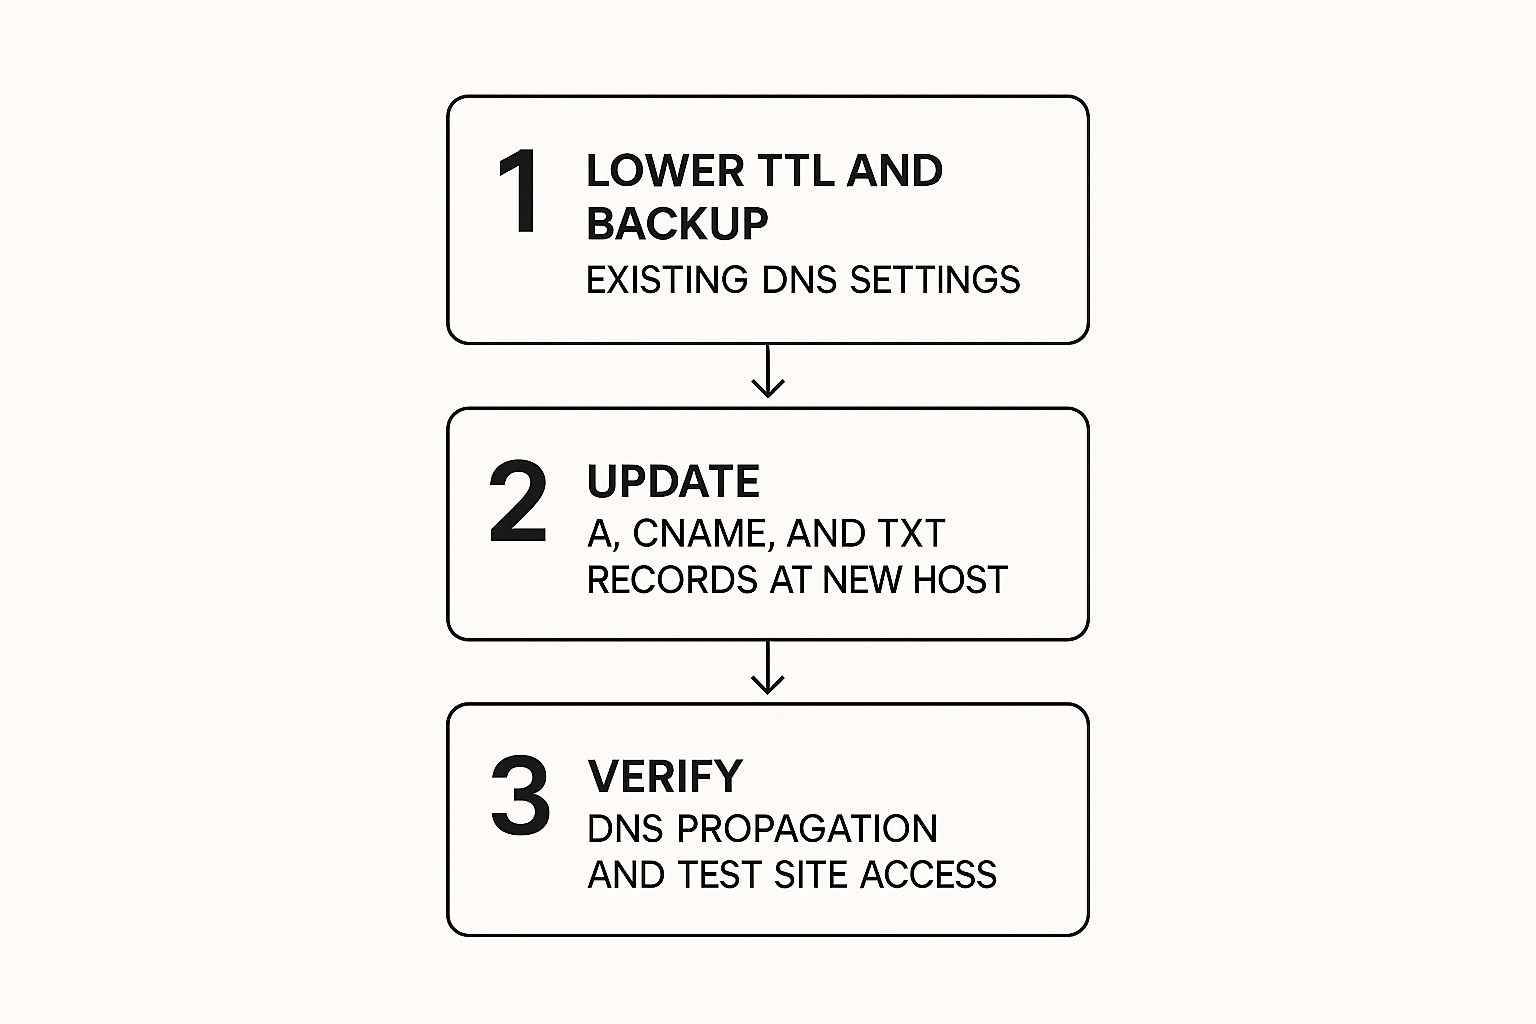
As you can see, it's a logical process: prepare your DNS, update the records, and then verify. Following a system like this is the best way to minimize downtime.
Preparing for the Go-Live Moment
As you get closer to launch, the final technical checks on your staging site become paramount. This is your last chance to catch any gremlins before they’re out in the wild.
Here's a quick final checklist I run through:
- Tracking Codes: Are Google Analytics, Google Tag Manager, and any ad platform pixels installed and working correctly on the new site? Double-check them.
- Server Settings: Make sure your
robots.txtfile isn't accidentally blocking search engines. Also, confirm your SSL certificate is properly configured for HTTPS across the entire site. - New XML Sitemaps: Generate a fresh, clean XML sitemap based on your new URL structure. You'll want to submit this to Google Search Console as soon as you go live.
- Final Crawl: Run one last crawl of the staging site to spot any lingering broken links, redirect chains, or missing page titles.
Once these checks are done, it's time to schedule a content freeze. This means no more blog posts, no new products, and no changes to the old live site. It ensures you don't lose any last-minute work during the final data sync. The final step is updating your DNS records to point your domain to the new server—a process that can take a few hours to propagate around the world.
Our detailed https://www.thatisrank.com/articles/website-migration-seo-checklist provides an even more granular look at this phase. By being meticulous with these technical steps, you’re paving the way for a smooth launch that protects your rankings and keeps your users happy.
Your Post-Launch SEO Health Checks

The moment your new site flickers to life is exhilarating, but popping the champagne is premature. Your real work is just beginning. Think of the launch as the starting line, not the finish. The hours, days, and weeks that follow are absolutely critical. You have to be vigilant, watching every signal to make sure the handover goes smoothly in the eyes of both search engines and your users.
This post-launch period is all about validation. It's where you find out if all that meticulous planning and technical heavy lifting actually paid off. This is your prime opportunity to find and squash any gremlins in the system before they can do real damage to your SEO.
Immediate Post-Launch Validation
As soon as you flip the switch, it’s go-time. Your first job is to confirm that all the core technical SEO plumbing is working exactly as planned. Don't wait around for data to start trickling in; you need to be hands-on, actively poking and prodding the site's most critical components.
I always start by running a fresh crawl of the live site with a tool like Screaming Frog. This gives you an immediate, real-world picture of what search engine crawlers are about to see.
Your Immediate Crawl Checklist:
- Confirm 301 Redirects: Take that master list of old URLs you prepared and crawl it. Every single one needs to return a 301 status code and point to the correct new page. Be on the lookout for any pesky 404s or, even worse, redirect loops.
- Hunt for 404 Errors: Your crawl report will instantly flag any broken internal links on the new site. These are dead ends for users and crawlers alike and need to be fixed on the spot.
- Check Canonical Tags: Verify that canonical tags are pointing to the definitive version of each page. I've seen this go wrong countless times, especially on e-commerce sites with product variants or pages with URL parameters.
- Review Metadata: Spot-check your most important pages. Did the meta titles, descriptions, and H1s all make the journey? It’s surprisingly common for them to revert to default settings.
Key Takeaway: The first few hours after launch are your golden window. Quickly finding and fixing a site-wide redirect flaw can mean the difference between a tiny blip and a ranking catastrophe that takes months to fix.
Monitoring Your Vitals in Search Console
With your initial technical audit done, Google Search Console (GSC) becomes your command center. This is where you get feedback straight from the source on how Google is processing your new site.
First things first, make sure the new site property (e.g., https://www.newdomain.com) is verified in GSC. Next, submit your new XML sitemap. This is like giving Google a fresh map and inviting it to explore. Some pros I know even temporarily host the old sitemaps on the new server, which can help Google connect the dots between the old and new URLs much faster.
Comparing Pre- and Post-Launch Data
Remember those benchmark reports you saved before the migration? It's time to pull them out. Comparing your new performance data against that baseline is the only objective way to measure success and spot a downward trend before it becomes a nosedive.
I live in these reports for the first few weeks after a launch:
- Index Coverage (GSC): You want to see a steady, graceful increase in indexed pages for the new site, with a matching decrease for the old one. If you see a sudden spike in "Excluded" pages, sound the alarm.
- Crawl Stats (GSC): Healthy migrations show a high level of crawl activity from Googlebot. If the crawl rate suddenly drops, it could mean Google is having trouble accessing your new site.
- Organic Traffic (Analytics): Keep a close eye on your organic traffic. I always add an annotation in Google Analytics on the launch date for easy before-and-after analysis. A small, temporary dip is normal, but a sustained drop of 10% or more for over a week demands an immediate, full-scale investigation.
- Keyword Rankings (Rank Tracker): Your rank tracking tool is your early warning system. Check your most valuable keywords daily. Some fluctuation is expected, but a dramatic, widespread drop is a major red flag.
For a much more detailed breakdown of what to monitor, our complete site migration SEO checklist dives deeper into this critical phase.
Finally, if your business depends on local customers, this is the perfect time to double-down on your local signals. A site migration can sometimes scramble these, so it's smart to run through a dedicated Local SEO Checklist to make sure everything from your GMB profile to local citations is pointing to the right place. By being proactive and data-obsessed after launch, you ensure your migration becomes a springboard for growth, not a source of regret.
Common Migration Pitfalls and How to Sidestep Them
Let's be honest: even the most meticulous migration plan can hit a snag. I've been in the trenches with these projects for years, and I've seen how a tiny oversight can quickly snowball into a traffic-killing disaster that takes months to claw back from. The best defense is a good offense—knowing what trips people up is the surest way to keep your own launch on track.
One of the most common—and frankly, embarrassing—mistakes is launching a new site that's still blocked from search engines. It happens all the time. During development, you're working on a staging server, and it's standard procedure to block crawlers with a robots.txt file or a "noindex" meta tag. You don't want Google indexing a half-finished site, right?
The problem is, in the chaotic rush to go live, someone inevitably forgets to flip that switch back. The result? Your brand-new site is a ghost town as far as Google is concerned. I once worked with a client who lost nearly all of their organic traffic for two solid weeks. The culprit was a single line of code left in the live robots.txt file: Disallow: /. Ouch.
Forgetting to Unblock Search Crawlers
Thankfully, the fix is straightforward, but it requires immediate post-launch diligence. Make this the very first thing you check once the site is live.
- Check
robots.txt: Pull upyourdomain.com/robots.txtin your browser. Make sure there are no directives blocking Googlebot or other important crawlers from your key directories. - Inspect Meta Tags: On your homepage and a few other critical pages, right-click and "View Page Source." Search the code for
<meta name="robots" content="noindex">. If you find it, it needs to go. - Use the URL Inspection Tool: The definitive check is inside Google Search Console. Pop a URL into the URL Inspection tool, and it will tell you in plain English whether Google can crawl and index that page.
This five-minute check is your best insurance policy against a catastrophic visibility drop right out of the gate.
Another classic blunder is mishandling redirects. It's not just about setting them up; it's about doing it cleanly. A lazy but common shortcut is to implement a blanket redirect, sending every single old URL to the new homepage. This is an absolute nightmare for both users and search engines. It tanks your hard-earned page authority and sends users looking for a specific product to a generic starting point.
Every old URL needs to map to its most relevant new counterpart. This should be a single, direct 301 redirect. Avoid redirect chains (like Page A going to Page B, which then goes to Page C) like the plague. They dilute your link equity and add unnecessary load time.
Failing to Update Internal Links
This next mistake is more subtle but can be just as harmful: forgetting to update your internal links. When you move to a new site, you could have hundreds, if not thousands, of links within your own content that still point to the old URLs.
Sure, your 301 redirects will catch them, but this forces both your visitors and search engine crawlers to take an unnecessary detour on every click. This creates a tangled web of internal redirects, which can hinder crawl efficiency and slightly weaken the flow of authority throughout your site.
Think about a top-performing blog post with a dozen links to other articles on your site. If all those links point to old URLs, every single click triggers a redirect. That adds up, creating a sluggish internal structure. The proper way to handle this is to run a crawl of your new, live site specifically to find and update all internal links. Point them directly to their final destination. This helps ensure a clean, fast, and efficient site architecture from day one.
Answering Your Top Migration Questions
Even the most detailed website migration checklist can't cover every single scenario. It’s completely normal for specific questions to pop up along the way—I see it with every project. Let's dig into some of the most common questions I hear from teams right in the thick of a migration.
The big one everyone worries about is, "How long will the SEO dip last?" I get it. It's nerve-wracking to see traffic wobble. While some minor fluctuations are almost guaranteed for a week or two, a well-planned migration should see things stabilize and bounce back within a month.
If you’re seeing a significant drop that lasts longer than 30 days, that’s a red flag. It almost always points to a critical oversight—missed redirects, major crawl errors, or content changes that weren't properly mapped.
Will I Lose All My Backlinks?
Absolutely not, as long as your 301 redirects are set up correctly. A 301 redirect is specifically designed to pass the overwhelming majority of link equity—that precious SEO value from your backlinks—from the old URL to the new one.
Where teams run into trouble is with missed or broken redirects. This is exactly why doing a complete backlink audit before the migration is non-negotiable. You have to identify your most powerful, high-traffic pages and ensure they are flawlessly redirected.
The real danger isn't that your backlinks will vanish. It's breaking the connection to them. A missed redirect leads to a 404 error, and just like that, the value of that hard-earned backlink evaporates until you fix it.
What Should We Do with the Old Domain?
So, your new site is live and performing well. What about the old domain? The answer is simple: keep it. Continue paying for the registration, and plan on holding onto it for the long haul.
It might seem like an unnecessary expense, but it’s critical for a few reasons:
- Protecting Your Redirects: All those 301s you carefully set up are hosted on that old domain. If you let it expire, every single redirect breaks. All the link equity they were passing is gone for good.
- Brand Safety: If you abandon your old domain, it will eventually go back on the open market. A competitor, or worse, a malicious actor, could snatch it up and use it to damage your brand’s reputation.
- Catching "Ghost" Traffic: You’d be surprised how long you’ll continue to get traffic from old, un-updated links scattered across the web. Keeping the redirect active ensures those visitors still land in the right place.
Think of your old domain as a permanent forwarding address for your business online. It’s a small annual fee that acts as a vital insurance policy for your SEO and brand integrity.
Ready to stop guessing and start tracking your migration's success with precision? That's Rank provides the daily rank tracking and site health audits you need to monitor performance before, during, and after your launch. Get the clarity you need to protect your traffic and grow your rankings by signing up at https://www.thatisrank.com.